


Paintings
A Stress-free Drawing Master Class
When I was a kid growing up in Michigan, I was privileged to take classes at Cranbrook Institute of Art. I have two memories of this experience. One is that the grounds were absolutely enchanting; I particularly recall the long Triton pool that I walked past to get to my class. I felt like I was in a storybook world.
The other memory is that I hated the teacher. Why? Because she had the nerve to tell me how to draw.
We were doing full-length self-portraits. When I proudly showed her my work, expecting praise, she pointed out that the hands I had drawn were out of proportion with the rest of the body. To illustrate, she placed her hand, fingers spread, over her face, noting that her hand covered her entire face. The hands I had drawn would have covered the nose and mouth of the face in the picture, at best.
She was right of course. But I let my se nsitivity to criticism blind me to the fact her “rule” could help my art. I decided I would no longer draw people in any serious way. Too many rules to stifle my creativity.
But now that I've been doing more sketching and have become a little less sensitive to criticism, I'm open to learning how to use the fundamentals of drawing to actually help my art.
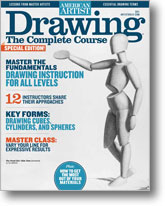
So I opened my copy of Drawing: The Complete Course from American Artist and chose to start with drawing a face. The object was to create a sketch that looked like it could resemble a person, not to make a completed drawing. Just the basics.
First sketch attempt.
Pretty childish.
First, I drew a face the way I would normally do it: an oval, facial features, some hair, and a neck.
After a few minutes with Drawing: The Complete Course.
Next, I turned to the chapter on “The Sphere” written by Jon deMartin, where he discusses drawing ovoids, specifically the human head.
“As a basic rule, the distance from the hairline to the eyebrow, from the eyebrow to the base of the nose, and from the base of the nose to the point of the chin are all equal, thus dividing the face (not the entire head) from top to bottom into thirds. The ear is placed in the middle of the head between the eyebrow and the base of the nose.
“The lower third of the face, from the base of the nose to the point of the chin, can be divided into thirds. The line indicating the upper third marks the center of the mouth. The middle third ends at the beginning of the upper chin. The last third goes from the upper chin to the bottom of the ovoid. The head is then divided from left to right into five equal segments, each one the width of an eye.”
OK, so there would be math involved, but I figured I could handle it. I drew an ovoid and divided it up as illustrated. I was surprised to see that the eyes should be right in the middle of the ovoid, but put them there as directed and proceeded with the other features.
Wow, what a difference! I spent just a couple of minutes more on my second sketch, but it was obviously worth it. Imagine what I could accomplish once I master planes.
Dividing the face into sections helps place the features proportionally.
One of the things I liked about this exercise was that I could follow the instructions and illustrations in Drawing: The Complete Course without anyone watching (and critiquing). Once I've explored the fundamentals, I can move on to on shading and then maybe still life drawing, all at my own pace.
I wish I'd been open sooner to learning some of these basic principles of drawing. As deMartin writes in one of the Key Advice sidebars that abound throughout the magazine, “Mastering these foundational skills does not just allow us to draw academic studies of shapes and the figure. Ultimately, it opens the gate to individual artistic expressions and visions of the natural world.”
Take it from someone who once attended Cranbrook, reading Drawing: The Complete Course is an economical, time-saving, stress-free way to take a master class in the fundamentals of drawing that will enhance your art.